Overview
The core of Penciler is an algorithm developed by UrbanSim that uses constrained optimization to maximize the unit count on a site given the zoning constraints of the site and the building program requirements of the user. The algorithm optimizes building typology and unit count given the site specifications and requirements of the user. The building layouts generated are not intended to replace an architectural floor-plan but rather give the user a sense of what unit count would be possible on the site given the constraints.
For information on how to search for a site and create a new project, see here.
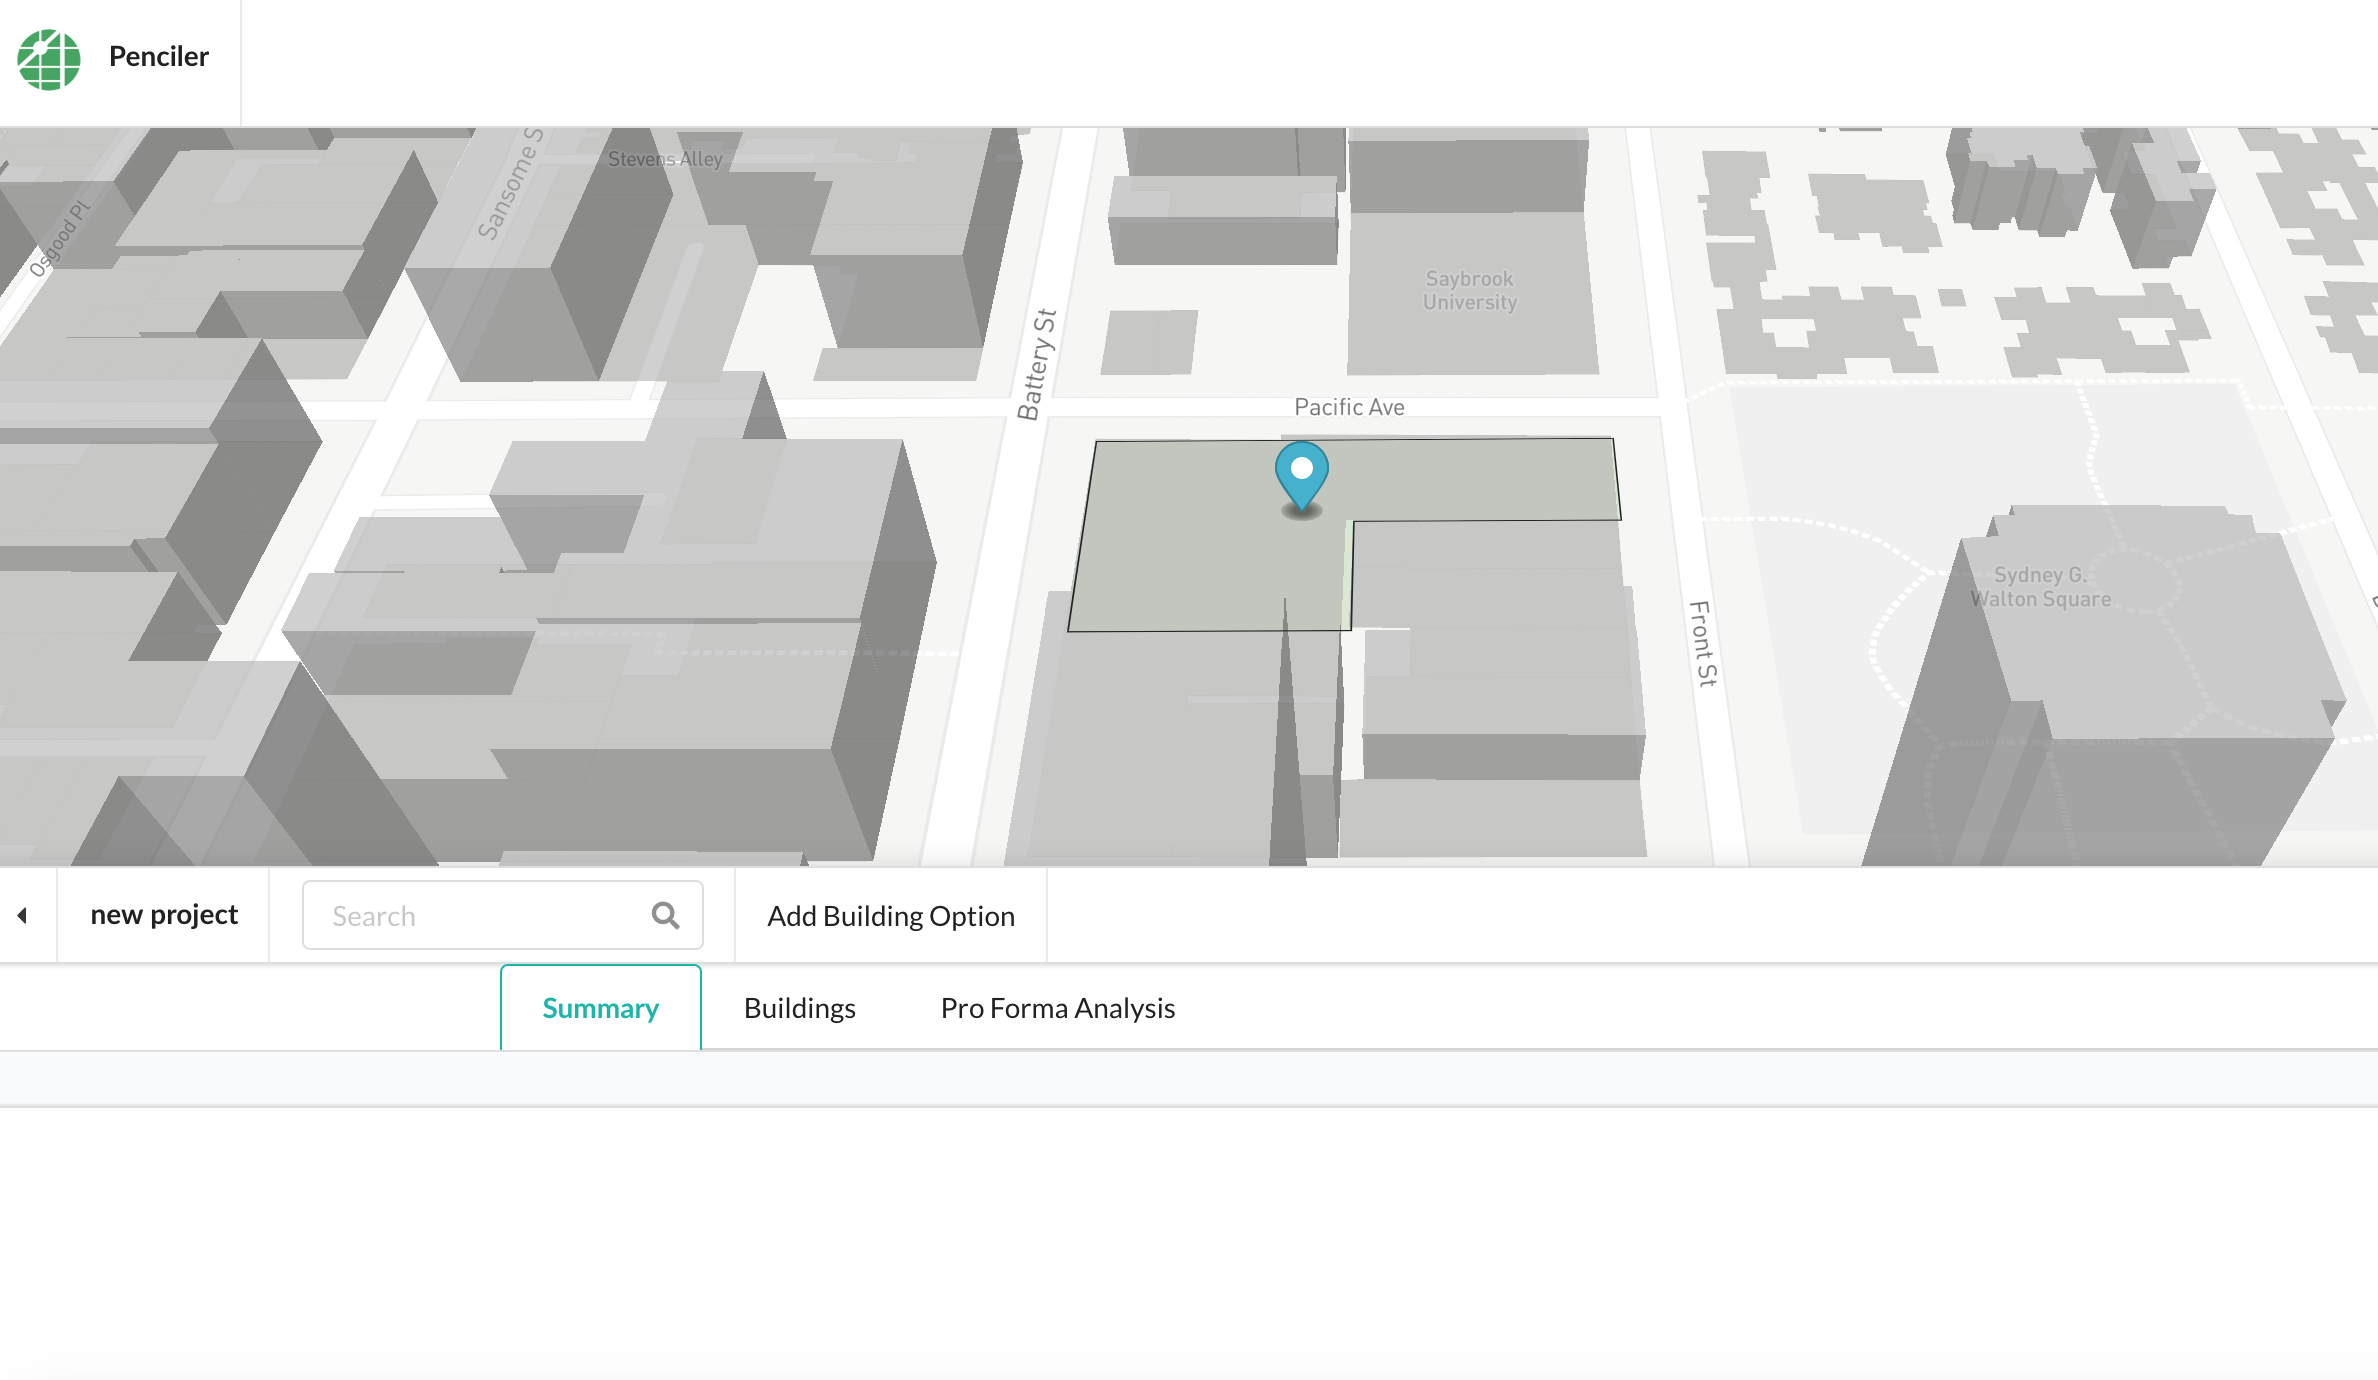
On the home page, open the desired project from your project list. For a new project, your Summary, Buildings and Pro Forma Analysis tabs will all be blank. In order to start your feasibility analysis you will need to create a new building option.
In order to create your first building option for the site, click ‘Add Building Option’ on the top bar.
Zoning Constraints
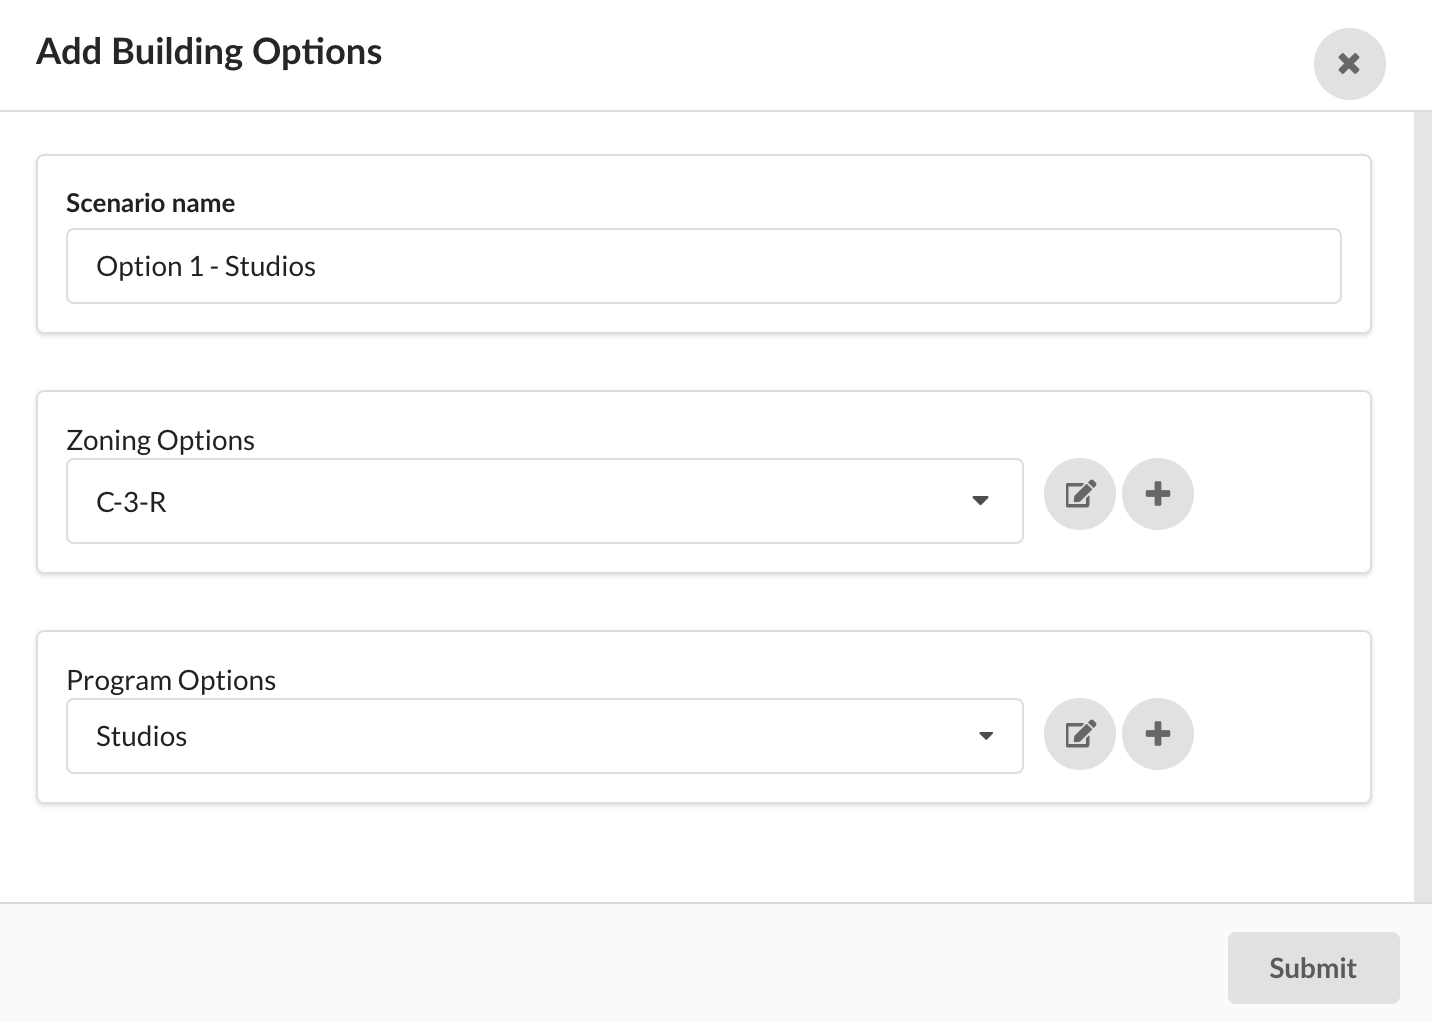
The zoning constraints of the site determine the buildable envelope; i.e. how tall, wide and deep the building can be, and in what typology. The zoning constraints database is region-specific. The zoning of the parcel will auto-populate in the zoning options dropdown menu. You can also select a zoning option from the dropdown menu. Click the edit button to the right of the dropdown to access the zoning wizard. Here you can change any of the zoning constraints. Clicking the ‘+’ to the right of the edit button allows you to add a custom zoning that will be saved to your account for future use.
The following zoning attributes are currently used in determining the buildable area:
Maximum allowable building height
Effective maximum building height (accounts for density bonuses and other height modifications)
Front setback (% of lot or ft/m)
Rear yard setback (% of lot or ft/m)
Side setback (% of lot or ft/m)
Minimum common open space per unit
Ground floor height
GSF of lot per unit (density limit)
Floor area ratio (FAR)
Podium height and lower tower stepback (bulk requirements)
Parking ratio (spaces per residential unit)
Multifamily Building Typology
Density Bonus
At the bottom of the Height & Density form you can click ‘Density Bonus’, which allows you to increase the density either by height or by density percentage. For example, the California State Density Bonus Program is determined on a percentage basis, while the San Francisco local density bonus program is height-based (HOME-SF). Both have requirements for including affordable housing on-site. To correctly use the height increase, indicate how much of the extra height should be allocated to the ground floor. To use the percentage increase, enter the value by which you want to increase the unit count (for example, the California State Density Bonus Program allows for a density increase up to 30% based on the amount of affordable housing provided on-site).
These steps are mutually exclusive; i.e. choose either a height or percentage increase.
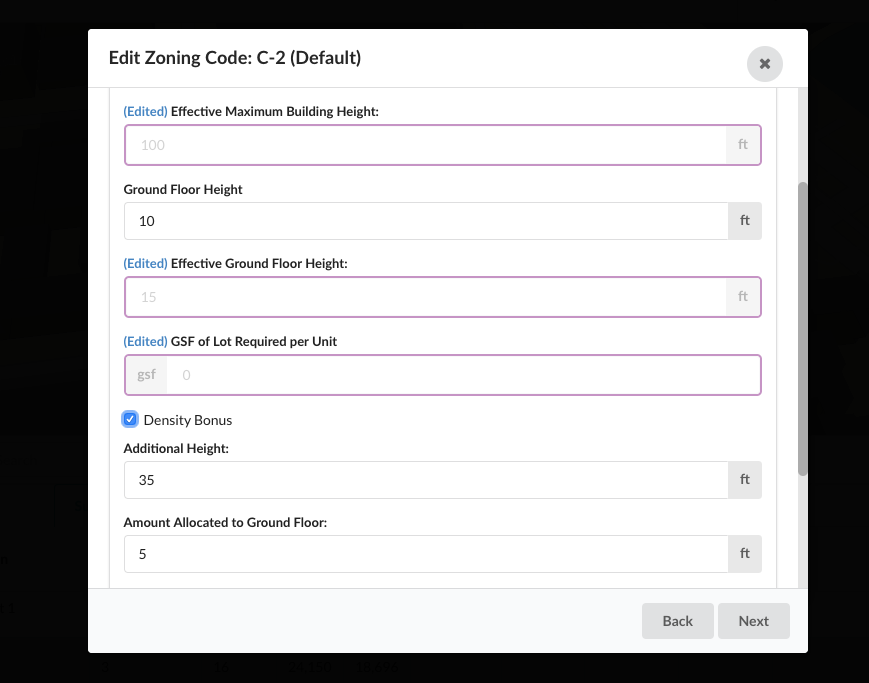
Adding density by increasing the height.
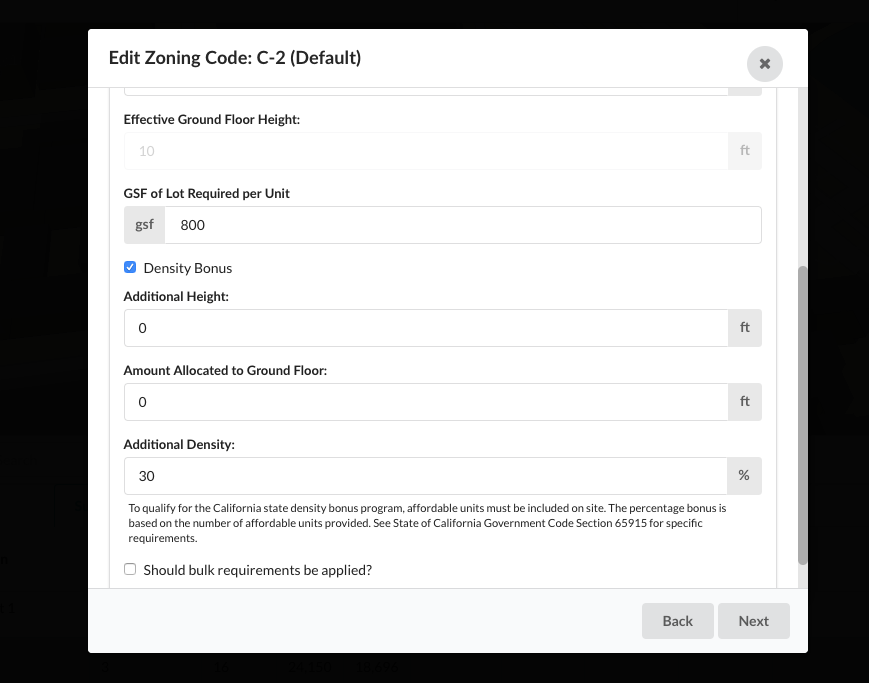
Adding density by increasing the units allowed.
Bulk Requirements
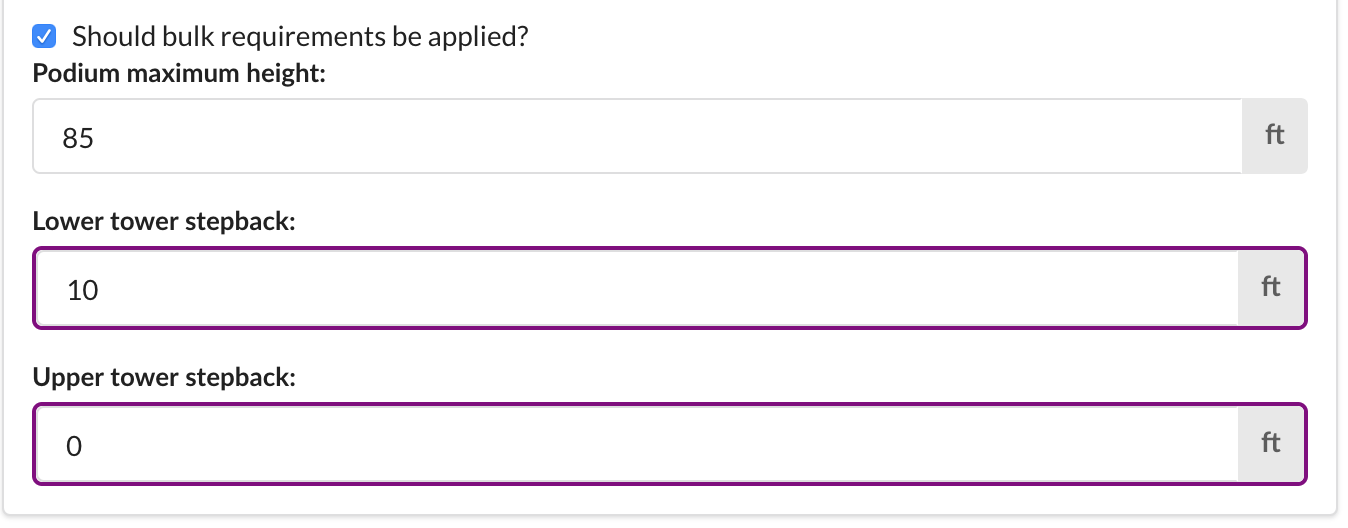
You can enter bulk requirements by checking the box next to ‘Bulk Requirements’. Indicate the maximum podium height, lower tower stepback (linear ft/m) and upper tower stepback (linear ft/m) if appropriate. Leave the input blank for upper tower stepback if the site only has podium and lower tower bulk requirements.
Floor Area Ratio
To add a floor area ratio (FAR) constraint, check ‘Add Floor Area Ratio Analysis’ beneath the density and bulk limits. Entering an FAR value will constrain the building output to that value. FAR is equal to the total GSF of the building divided by the GSF of the lot. FAR is a form-based density limit and is sometimes used in place of density limits.
Parking
The final panel of the zoning wizard allows you to add subsurface or podium parking to the building. To read more about parking, see here.
Editing Zoning Constraints
The following are examples of zoning constraints that are auto-populated by zoning type. You can edit any of these assumptions if you expect to get a variance or if you want to understand the impact of a zoning change or modification.
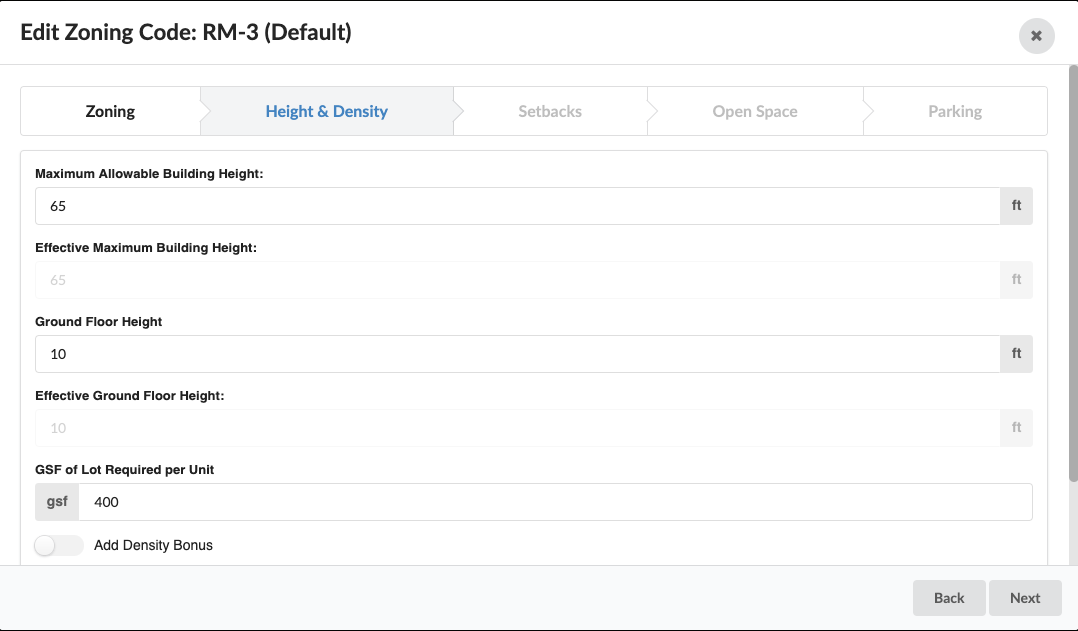
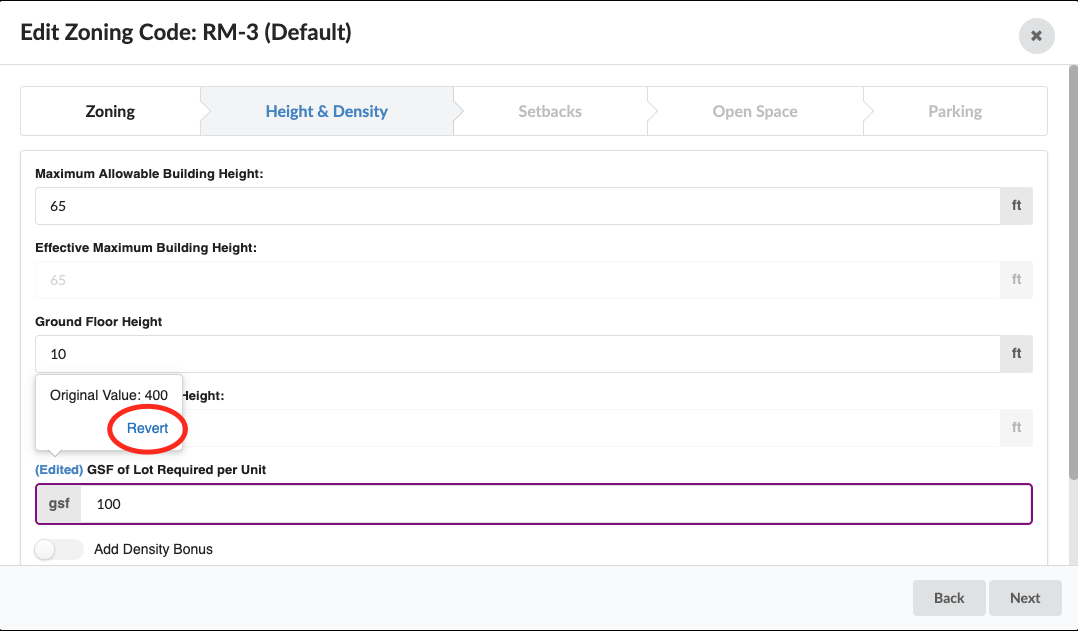
If you make a change to a zoning constraint, such as reducing the GSF of lot per unit to achieve greater density, this change will be visible when you go back to edit the building option in the future. Input boxes that contain edited values, or values that are not originally from the zoning designation of the site, will appear outlined in purple. If you click ‘Edited’ above the value you will be able to see the original value determined by the zoning of the parcel and revert back to that value.
Building Program Requirements
The multifamily building program requirements inform what spaces must be taken into account in the interior of the building. For example, you may want to include commercial retail space. The layout algorithm can incorporate this space into the ground floor.
Under “Program Options’ is a dropdown menu that shows your saved multifamily building programs. You can edit any of these by selecting the program from the dropdown and clicking the edit button to the right of the menu. You can add a new building program by selecting the ‘+’ to the right of the dropdown menu. This will open the program wizard, allowing you to enter different space and program requirements and name the building program for future use.
The following multifamily building code requirements and circulation preferences can be edited by the user:
Minimum corridor width (refers to the minimum EXTERNAL distance between two building corridors)
Residential ceiling height
Accessible roof (used for open space)
The following multifamily building code requirements are determined automatically:
Minimum stairwells
Minimum number of elevator banks
Minimum hallway width
The following multifamily building program requirements can be added for each building option:
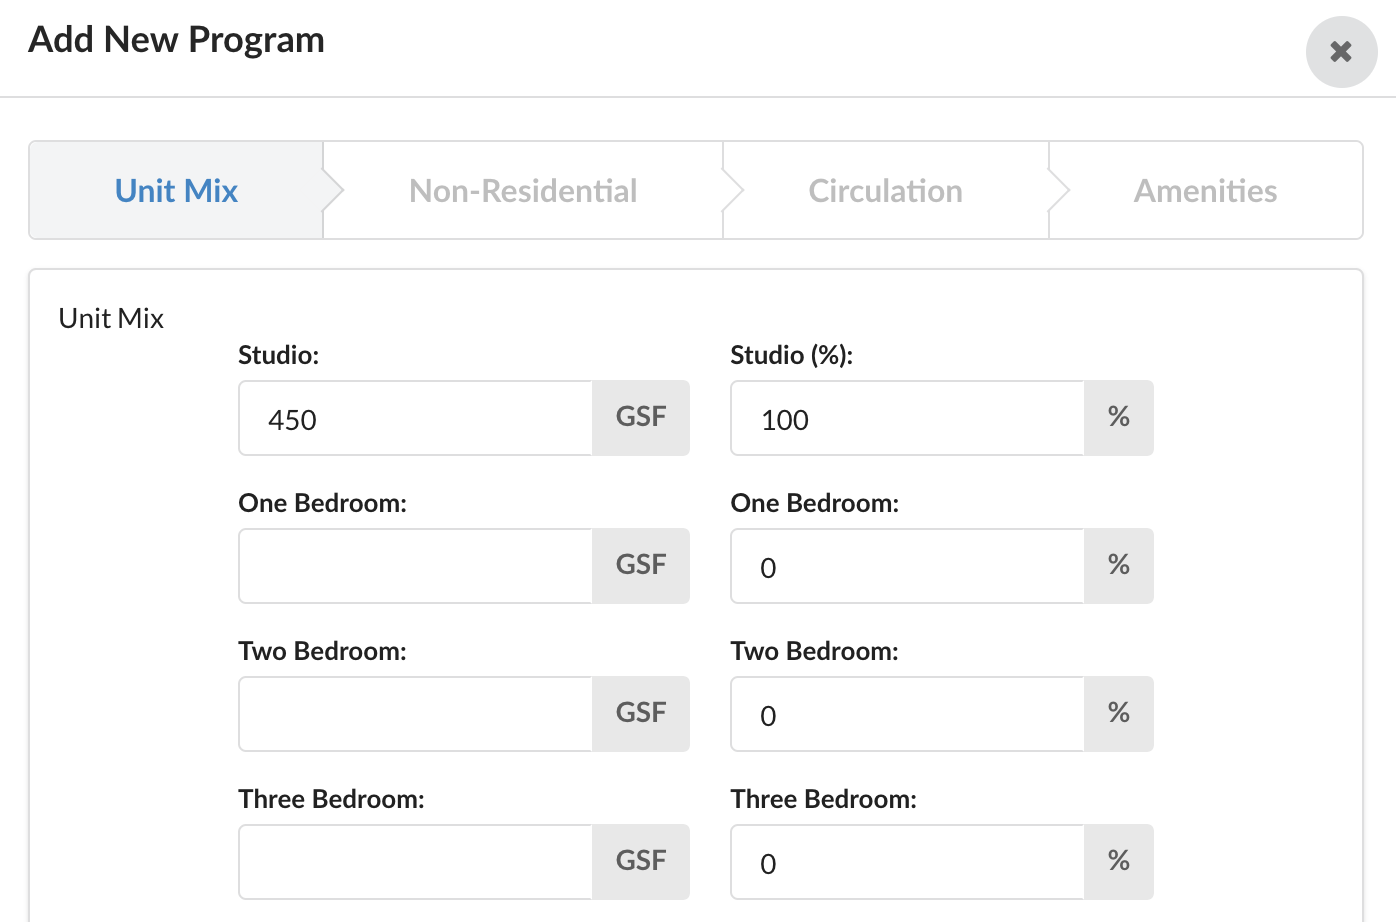
Unit mix
Gross square feet or meters per unit type
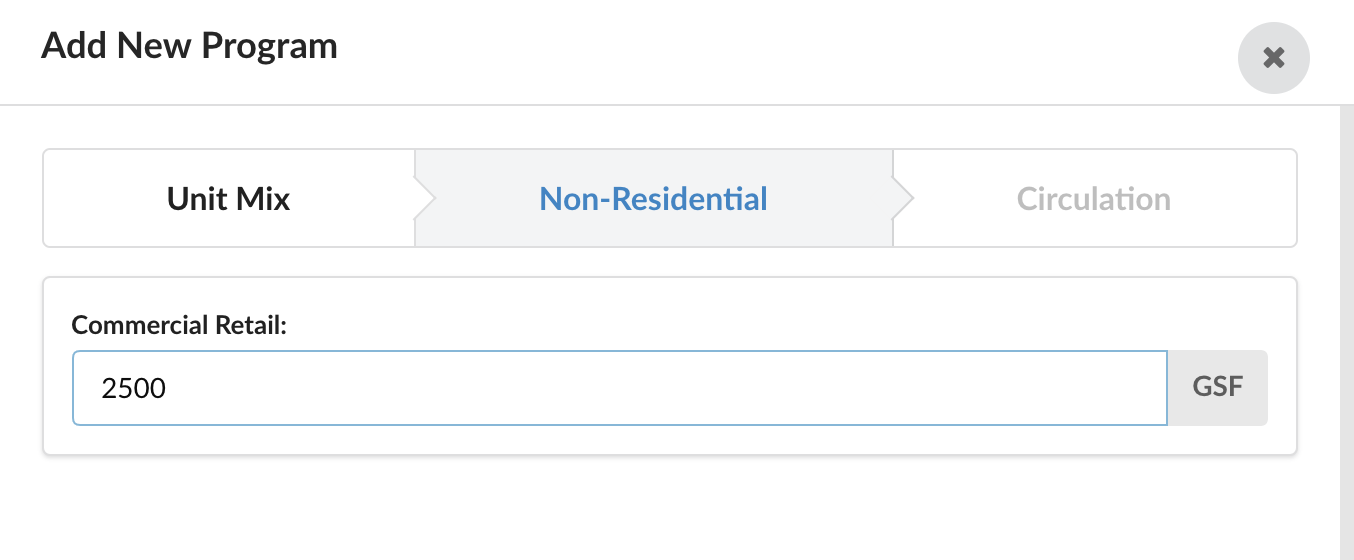
Ground floor commercial retail (gsf/m)
Indicate the desired square footage of each unit type and the unit mix. The unit mix is indicated as a percentage of all units.
Commercial retail space is accommodated on the ground floor. Enter the desired amount of ground floor retail space.
When you are done modifying the zoning and building program requirements, click ‘Submit’ to generate the building option.
Single-Family-Attached Building Typology
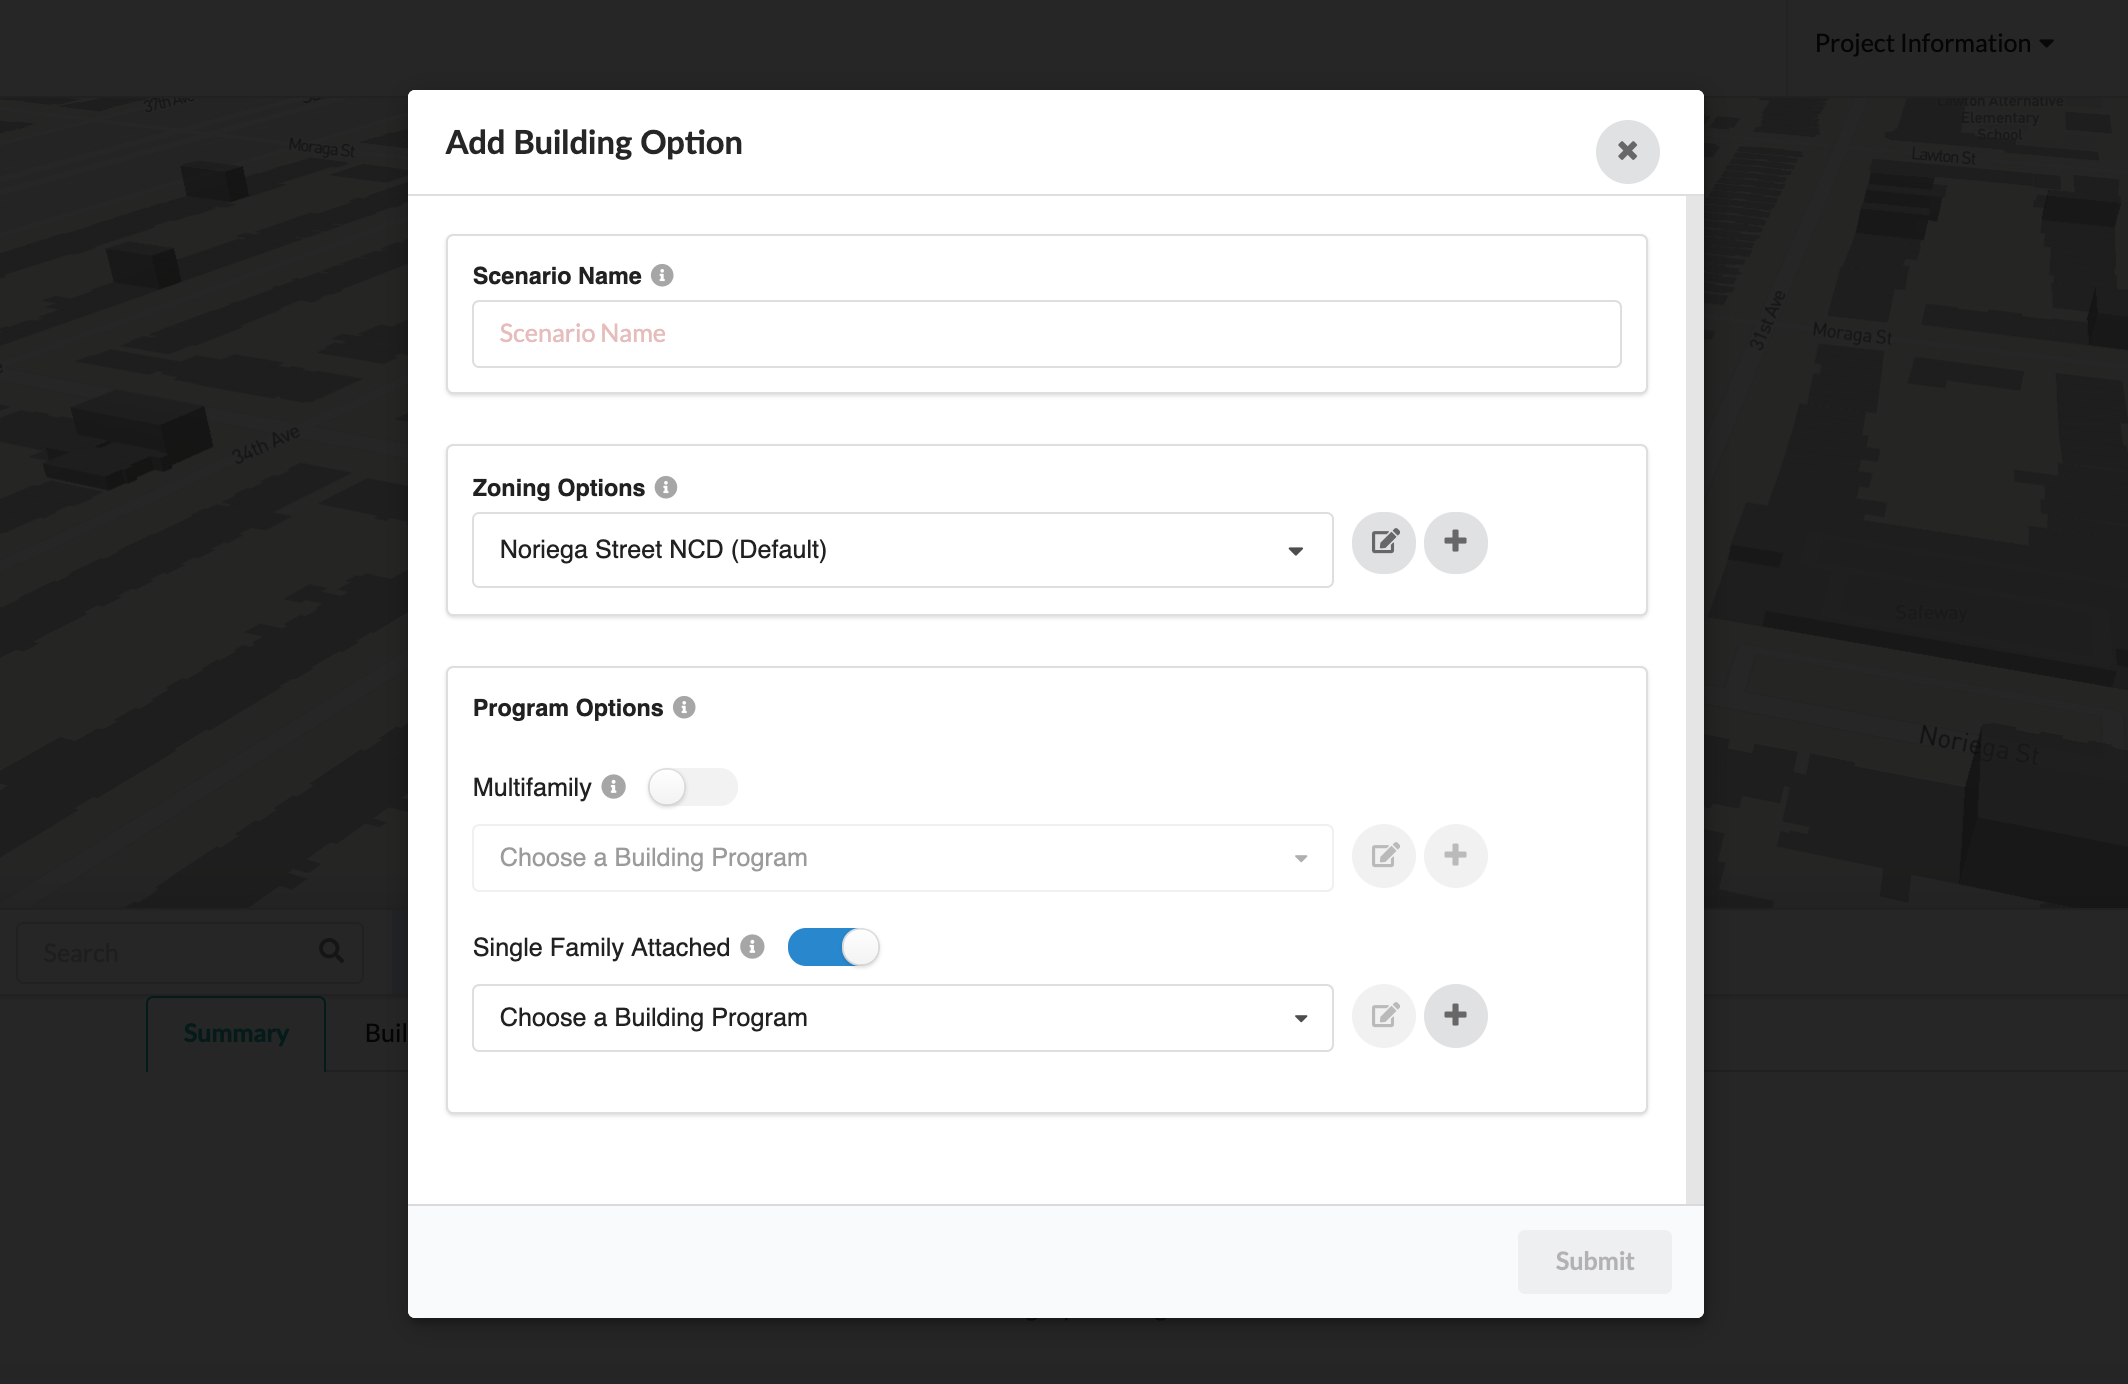
‘Single Family Attached’ buildings include the typology typically known as a duplex, triplex or quadplex, or a multifamily building in which units are attached but do not have a shared internal corridor. For parcels with strict density limits, the ‘Single Family Attached’ building typology option will be pre-selected, but you can toggle the option on at any time.
Building Program Requirements
To add a building program option for this typology, click the ‘+’ button next to ‘Single Family Attached’. This will pull up the building program requirements for this building typology. After you save this building program option you will be able to access it from the dropdown menu in the future.
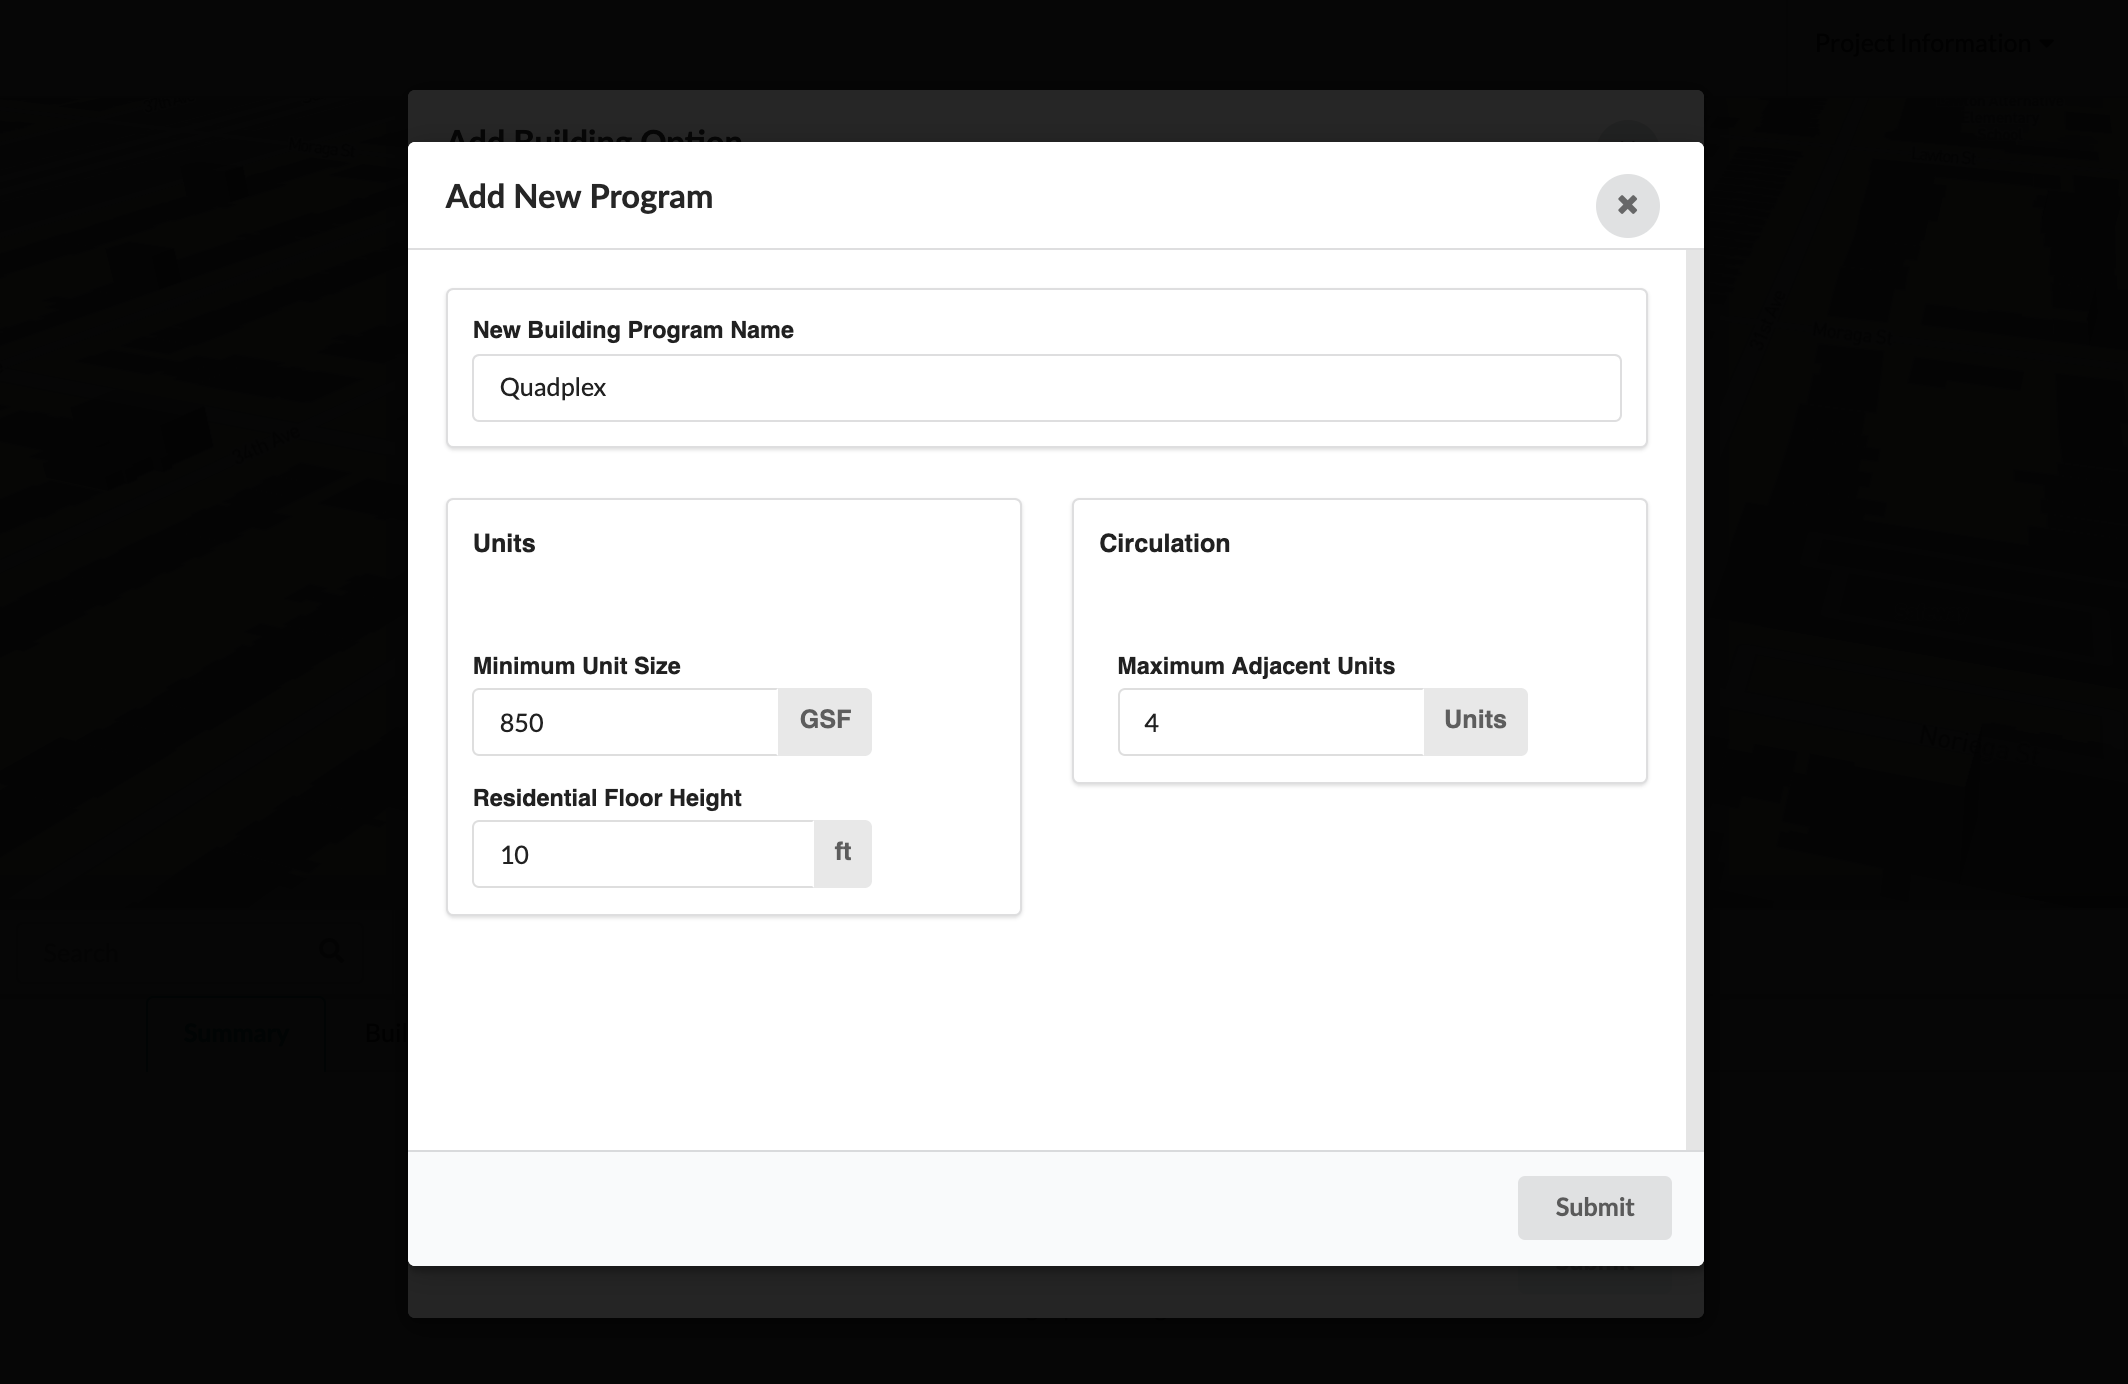
The building program requirements for this typology are more straightforward. Indicate the minimum desired unit size and the maximum number of desired adjacent units. In reality, the number of adjacent units will be determined by the buildable area and density limit of the site. To test both multifamily and single family attached building typologies simultaneously, simply toggle both options on and choose a building program for each option. The layout algorithm will choose the option with the highest unit count that respects the zoning constraints and building program requirements. For example, if the density limit allows for only two units on the site, and you select both building typologies, the layout algorithm will produce a duplex building typology.
After submitting your single-family-attached building option, the building output will appear in the building options table alongside any other building options you have already created.
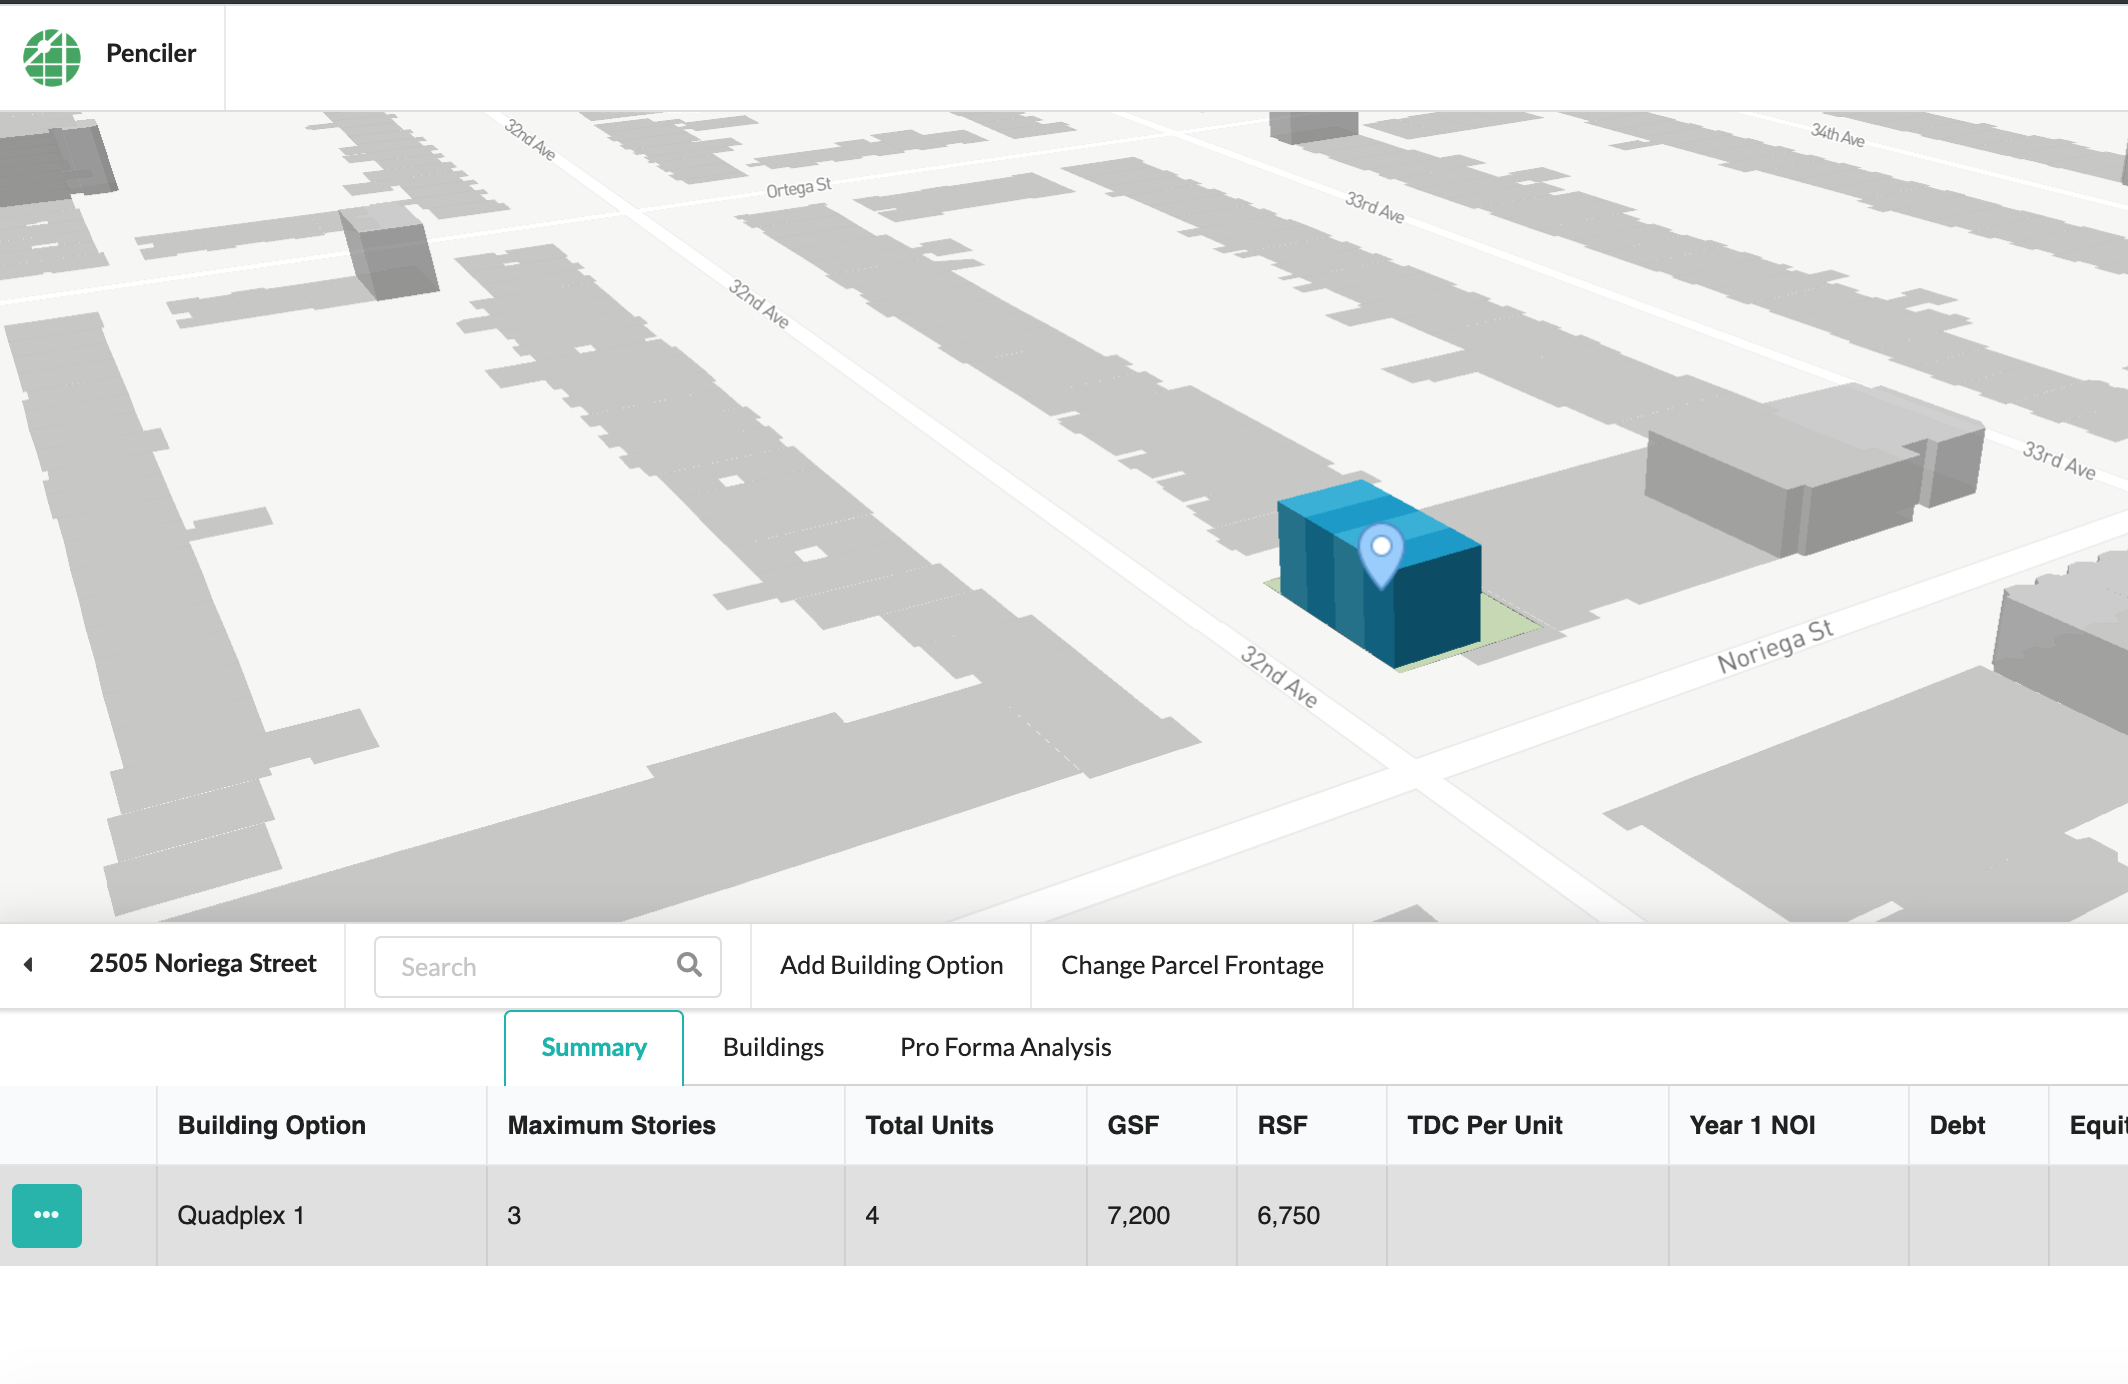
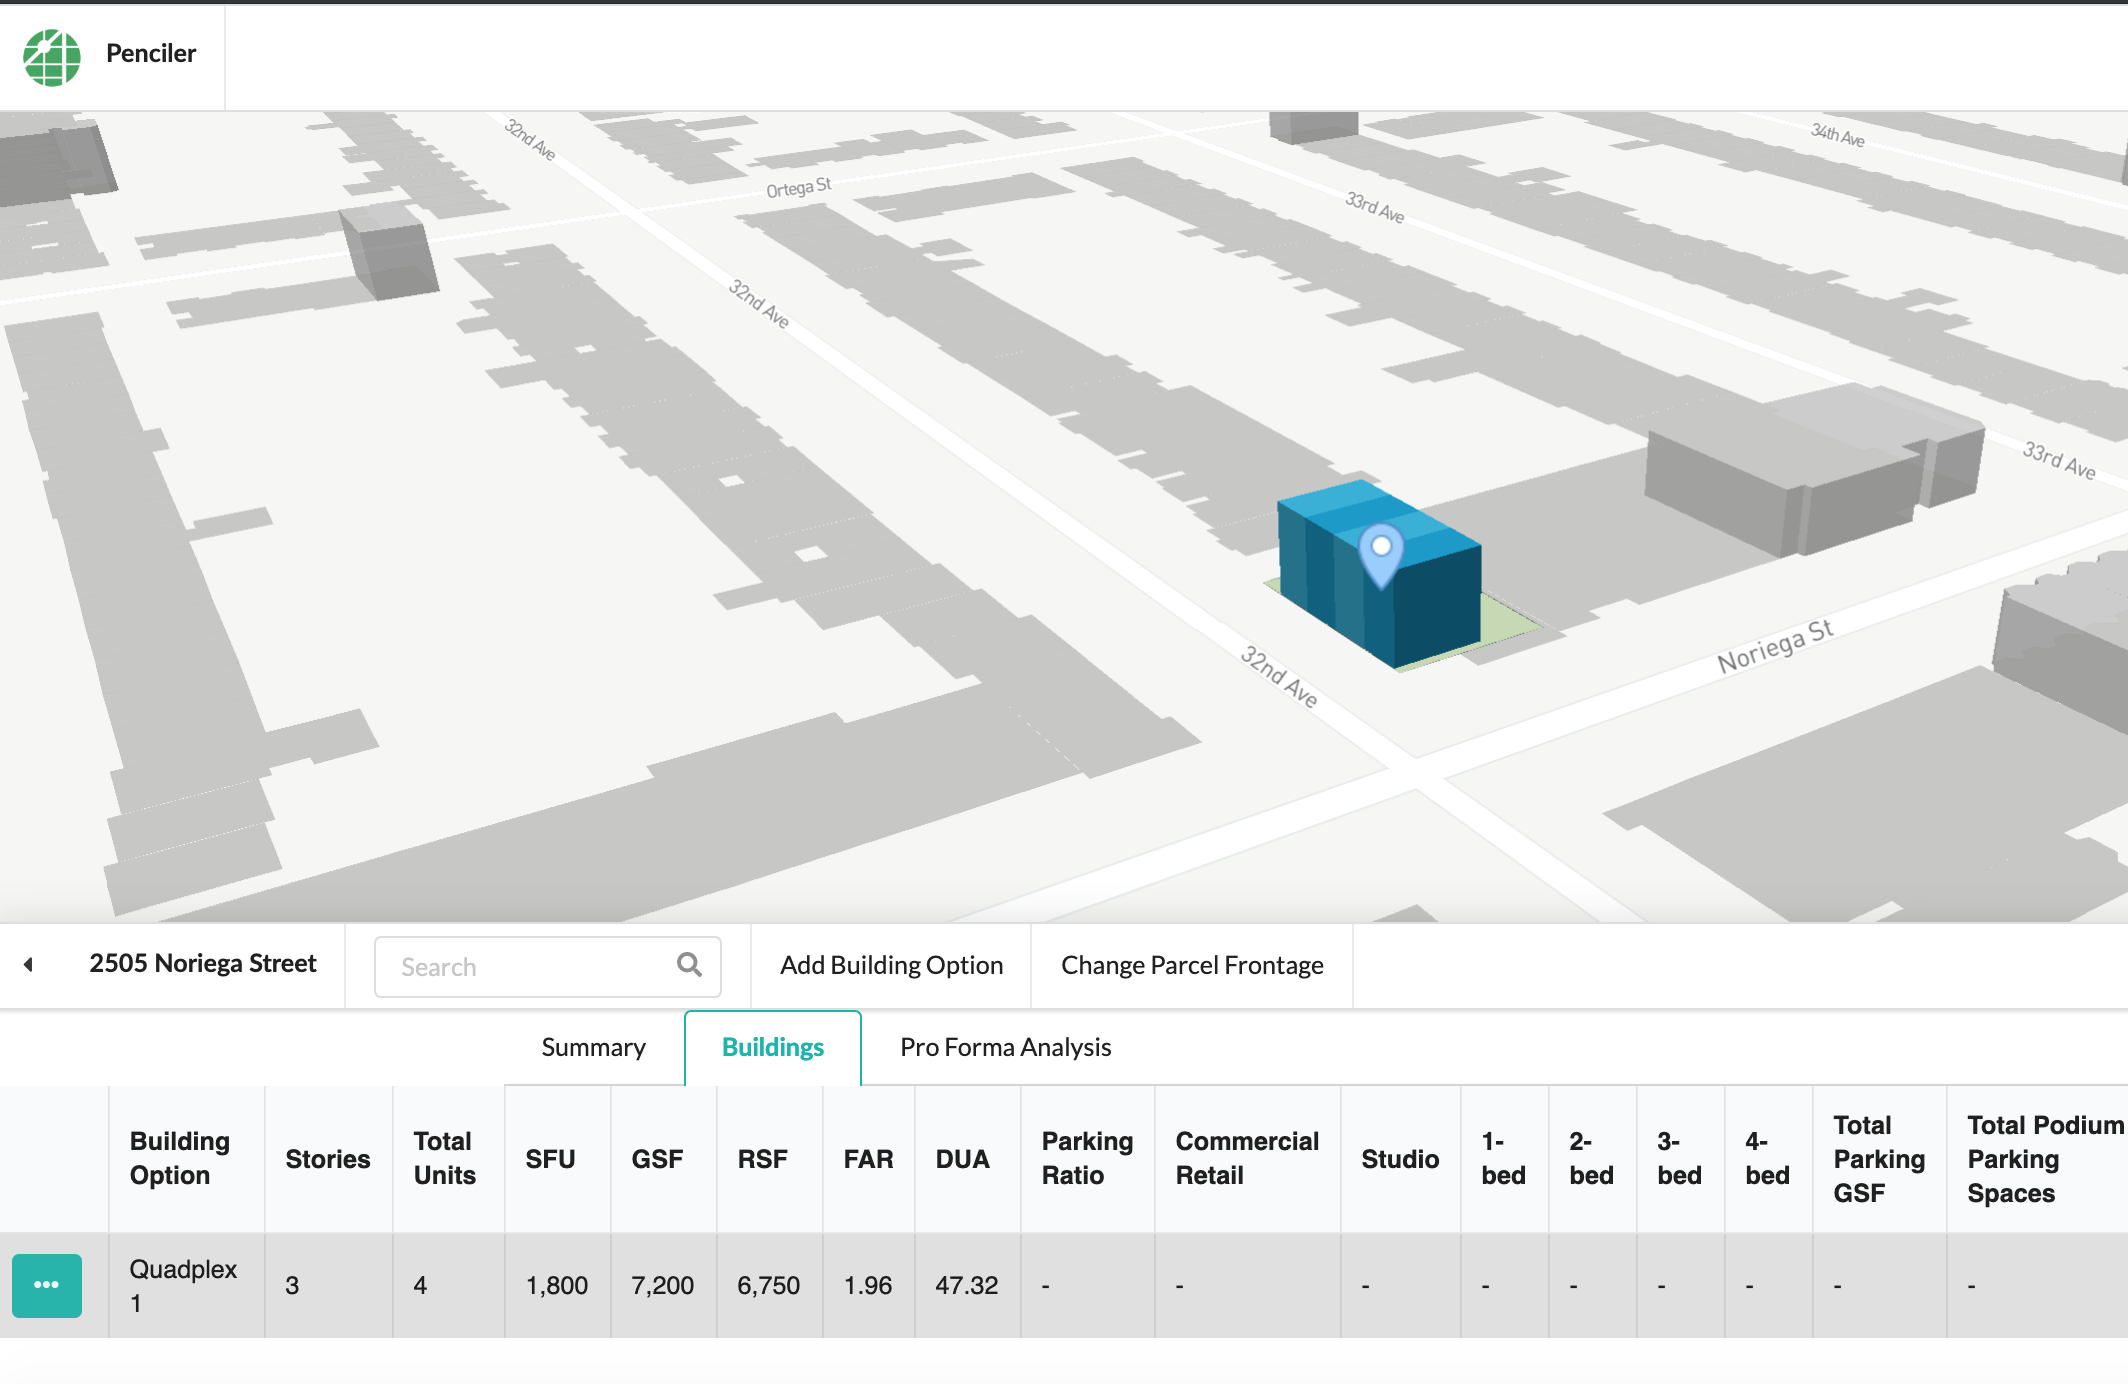
More detailed building outputs, such as the GSF per unit, will appear under the Buildings tab:
Visualization
The 3D massing of the building you have generated will appear in the map. Clicking on a different building option in the summary table will cause the massing of that option to appear in the map.
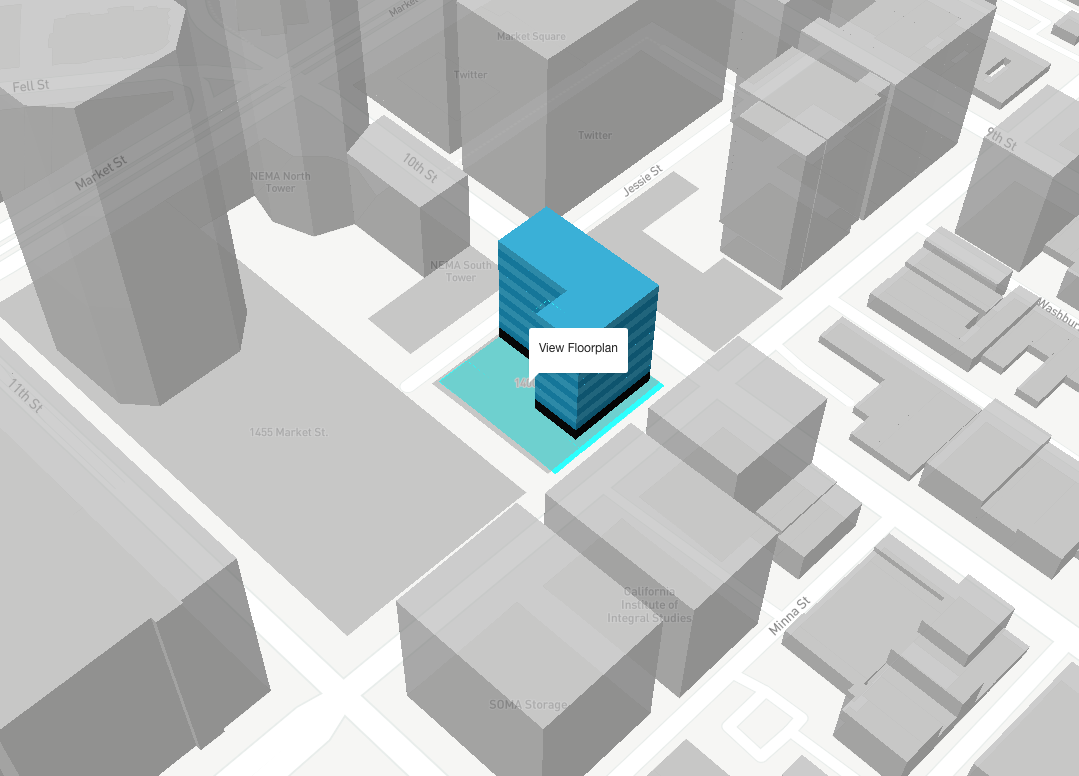
Hover and click on the building to pull up a 2D floorplan visualization. If you have input bulk requirements, use the arrows next to the floor label to flip through different floors.
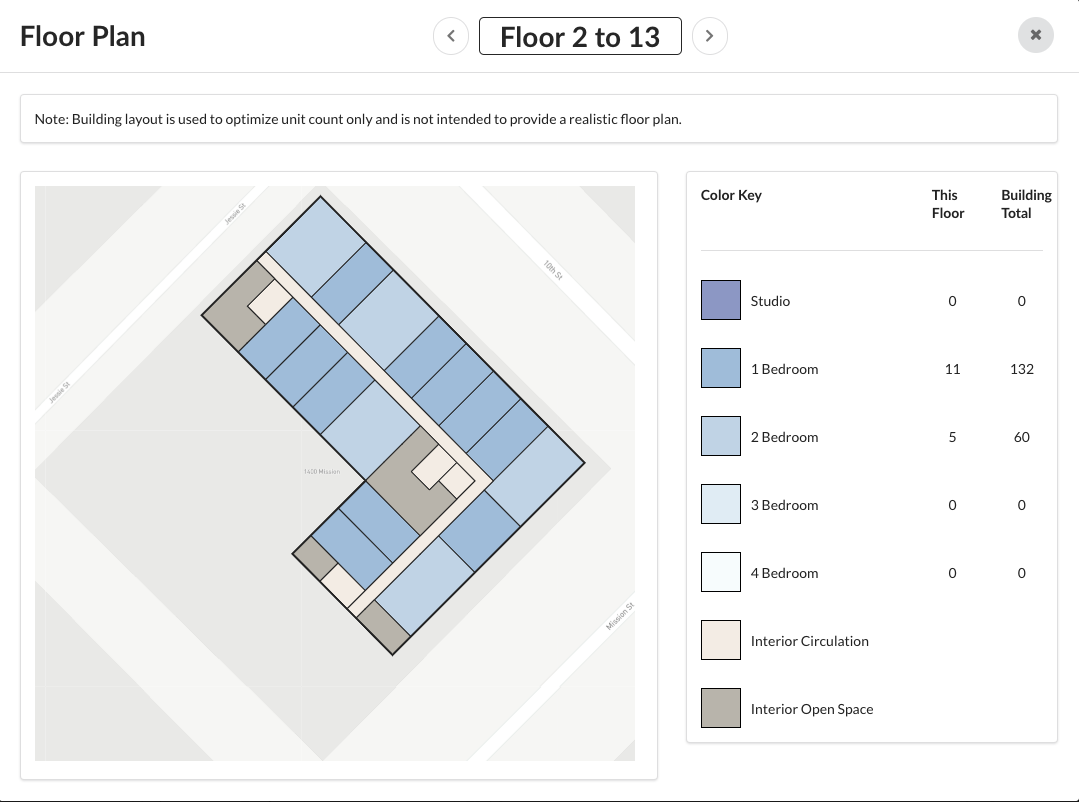
You will not see the ground floor. Ground floor space is left open to accommodate various extra spaces, including retail space if included in the building program form.
Changing Parcel Frontage
To change the front, rear yard or side designation of the parcel, select ‘change parcel frontage’ from the top bar of the building summary table. This will affect each future building option but not options that you have already created.
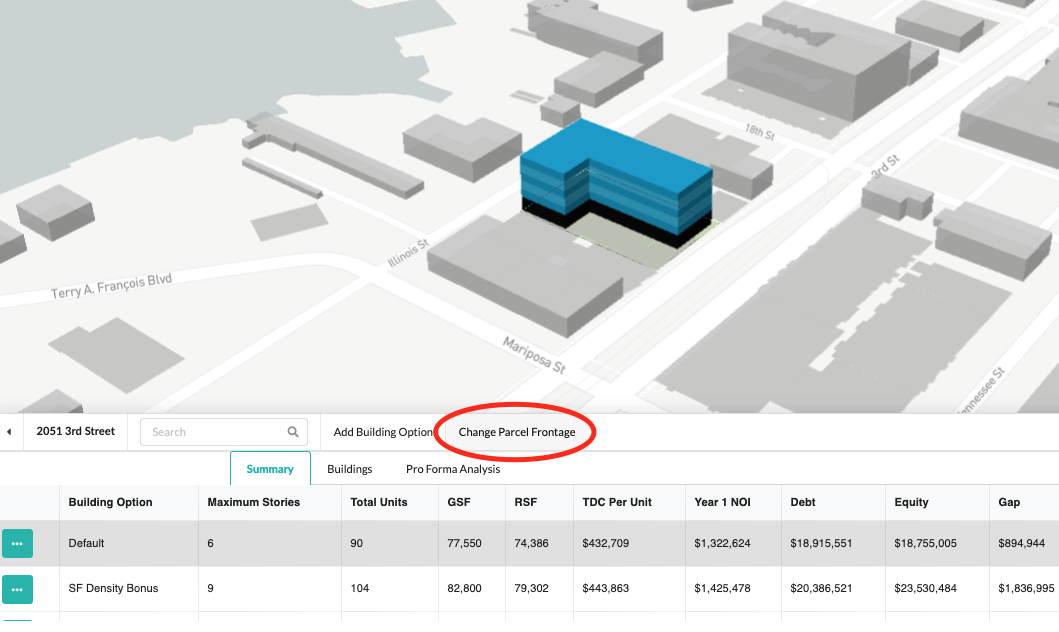
To indicate that you want building frontage on two opposite ends of a parcel, select both of those sides as the ‘frontage’. This will prioritize the placement of corridors along both ends of the parcel.
Summary and Exports
The buildings summary table shows you attributes of each building you created, allowing you to quickly compare options.

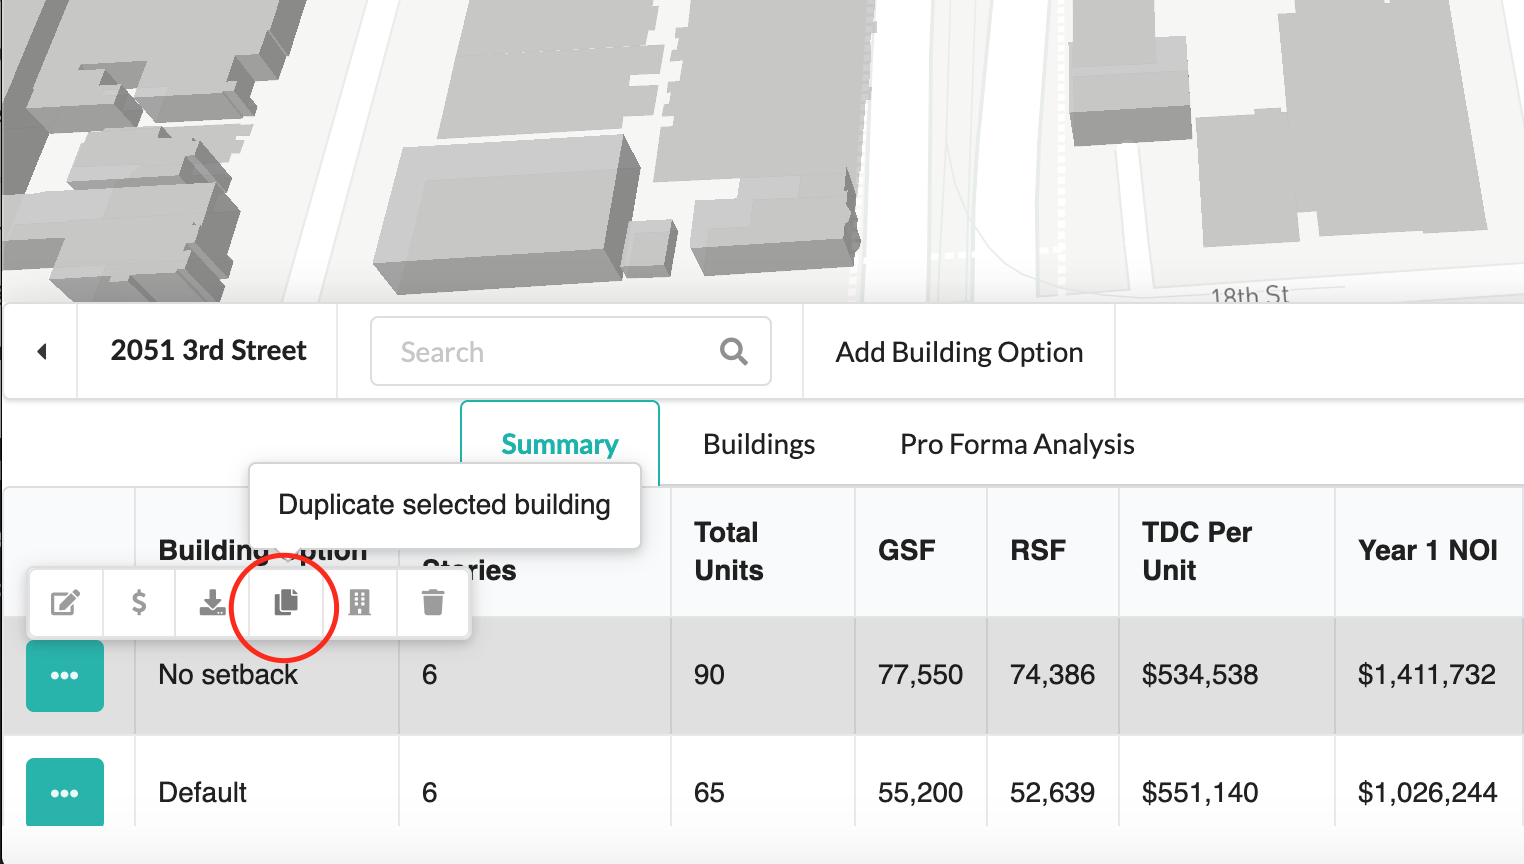
From here you can also edit buildings options, duplicate building options and download a PDF export for each building option. To duplicate a building option, hover and click on ‘Duplicate selected building’. This will copy all of the elements of that building option, including the financial analysis, allowing you to make simple changes.
To download a PDF summary, hover over the download button and choose ‘PDF Summary’:
